Where My Homelab Actually Started
This post will evolve as my lab evolves. What once started small is slowly turning into something much bigger.
Where This Lab Actually Started
Before the NUC. Before Unraid. Before Docker containers everywhere.
It started with a Raspberry Pi 4 (8GB).
Raspberry Pi 4 (8GB)
The Pi was my first standalone device that wasn’t just a normal desktop or laptop.
I bought it to experiment.
At first, I was just curious about:
- Hosting SAMBA shares
- Running Ubuntu Server
- Setting up small Linux services
- Retro gaming
- Lightweight server testing
- Learning networking basics without breaking anything important
It was perfect for that stage of my learning.
The Pi forced me to:
- Learn headless setup
- Work inside the terminal
- Understand permissions
- Configure network services manually
- Break things and fix them
But over time, I started running into limitations.
The ARM Limitation
The Raspberry Pi runs on ARM architecture.
And while it’s powerful for its size, I kept running into:
- Containers not supported on ARM
- Some tools not compiling properly
- Performance bottlenecks under load
- Storage limitations
- Thermal throttling during heavier workloads
At first I thought I could accepted the limitations and make things work.
Then it clicked:
This is where the bigger home labs I have been studying started.
I knew I was going to build something bigger but also something compact, efficient, and power friendly.
Isolating My Network
Before expanding hardware, I knew managing the home network was going to be tough with others always connected.
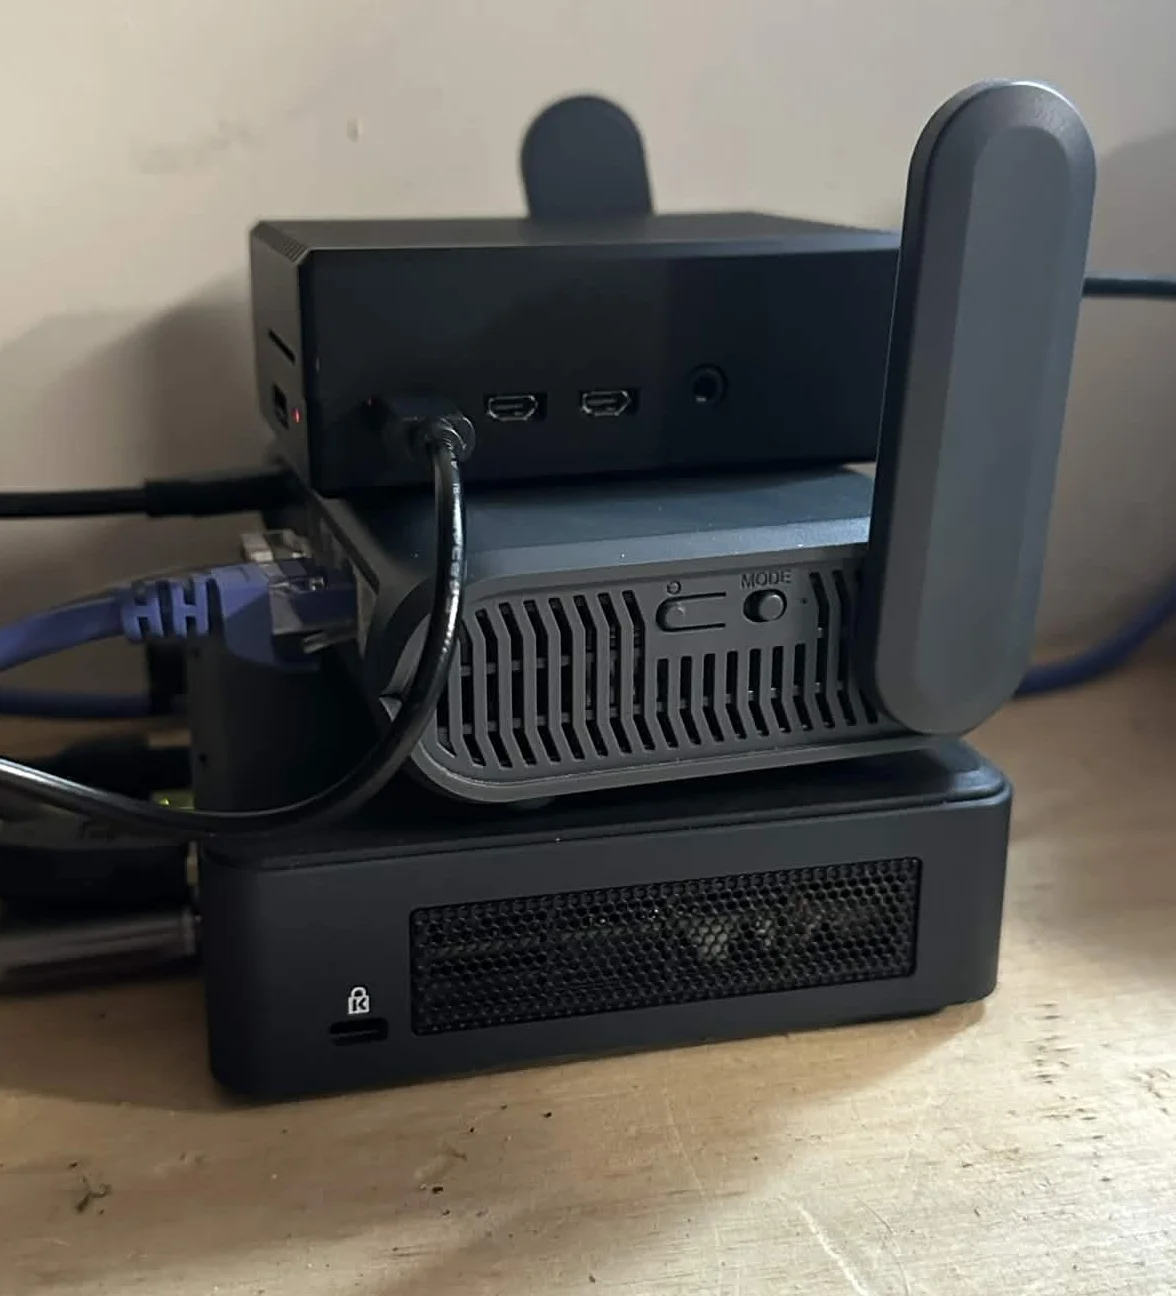
I bought my own GL.iNet ATX1800 (Slate AX) router.
I knew I was going to:
- Spin up servers
- Experiment with DNS
- Break things
- Change DHCP scopes
- Play with firewall rules
- Open ports
- Test segmentation
And I didn’t want to disrupt other people in the house.
So I created my own isolated environment.
This gave me:
- Full control over DNS
- Full control over DHCP
- Independent SSID
- A sandboxed lab network
- Freedom to experiment
This control pushed me into understanding networking, not just how it’s used.
Outgrowing the Pi
After a few months, I hit a wall.
I was tired of being limited by ARM. I wanted:
- Full x86 compatibility
- More RAM headroom
- Better virtualization support
- Docker without architecture headaches
- Something small and power efficient
So I bought an 11th Gen Intel i5 NUC.
Small. Compact. Low power draw. Quiet. Perfect.
Entering Unraid
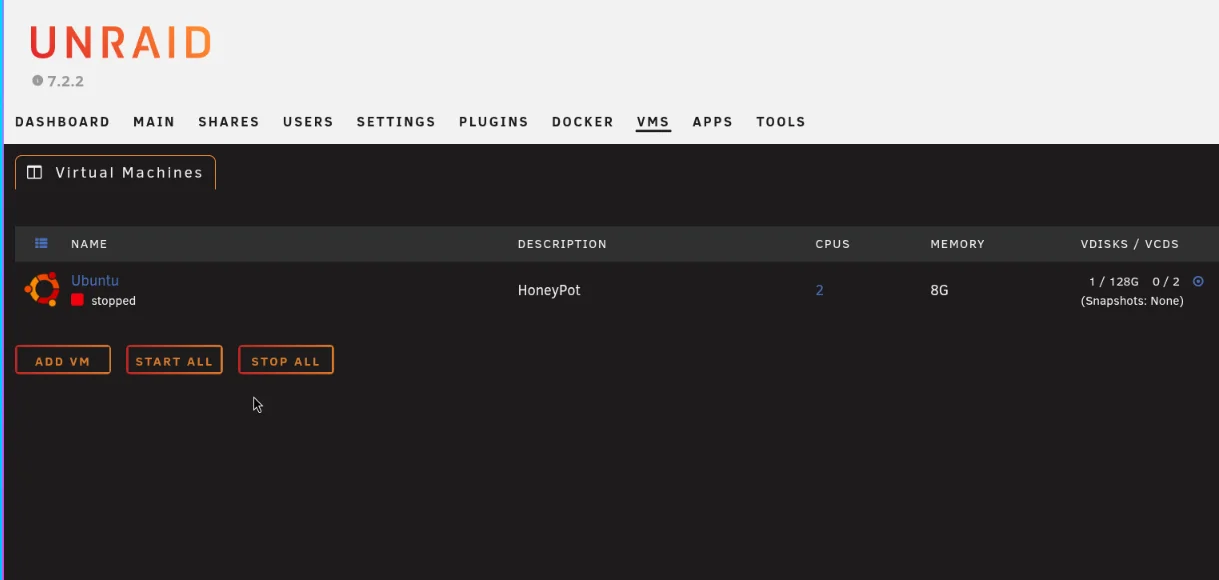
Once I had the NUC, I installed Unraid OS.
This changed everything I thought I knew about hosted media servers and server hosting in general.
Unraid runs directly from a bootable USB and loads itself into memory.
That means:
- The OS isn’t constantly writing to disk
- Storage drives are used for data
- You keep system overhead minimal
- It’s extremely flexible for home server setups
Unraid became my central hub.
From there I could:
- Host SAMBA shares
- Run a full Plex Media Server
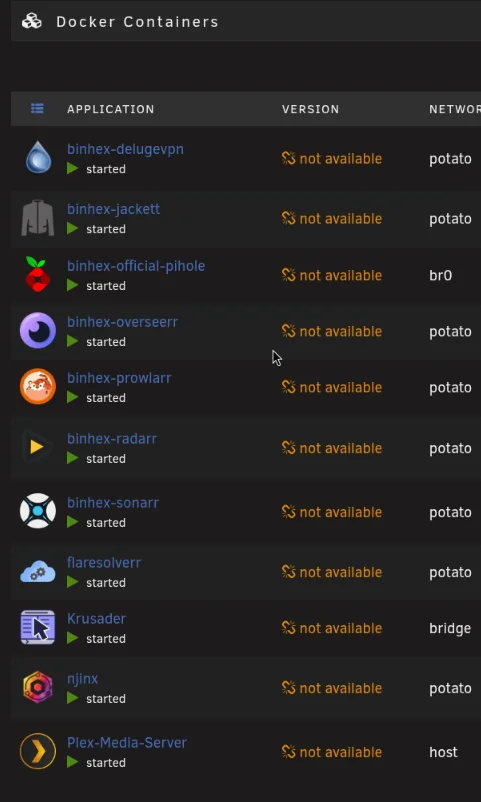
- Deploy multiple Docker containers
- Manage storage pools
- Spin up VMs
- Expand as needed
It gave structure to what was previously just experiments.
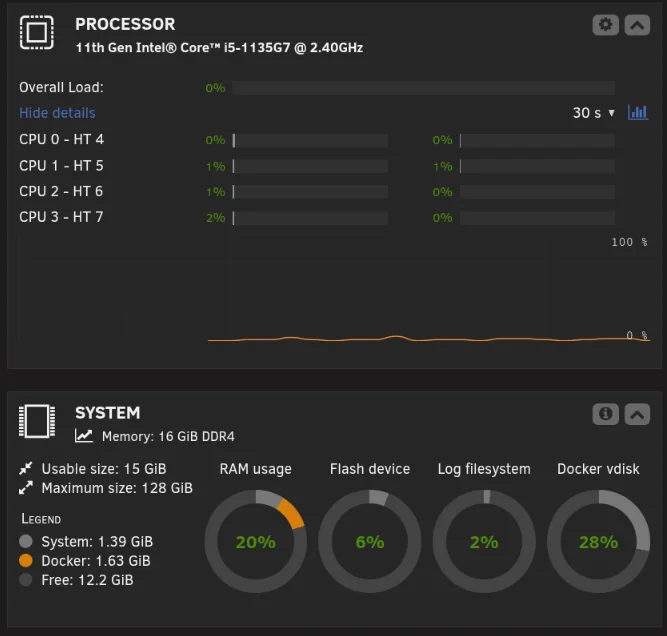
What I’m Running Now (Core Services)
Right now, my NUC running Unraid is handling:
- Plex Media Server
- Pi-hole
- Multiple Docker containers
- Centralized storage shares
- VM support for future expansion
And this is still just the beginning.
What I Learned From Starting Small
Starting with the Raspberry Pi was the best decision I could have made.
It taught me:
- Linux fundamentals
- Network basics
- Service configuration
- Permission models
- Why architecture compatibility matters
- How quickly small hardware can hit limits
And it made upgrading intentional.
I didn’t buy the NUC because it looked cool.
I bought it because I outgrew the Pi.
Security Tooling Expansion
As the infrastructure matured, I started layering in security tooling.
That’s when I deployed:
- Wazuh (SIEM + log analysis)
- Sysmon for enhanced Windows telemetry
- Pi-hole for DNS visibility
- Tailscale for secure remote access
See: Deploying Wazuh in My Homelab See: Enhancing Wazuh Telemetry with Sysmon
What’s Next
My lab is still growing.
Next steps:
- Managed switch for VLAN segmentation
- Dedicated management network
- Further Docker expansion
- More security tooling
This post will be updated as the lab grows.
This is my documented progress.
If it’s not broken, fix it til it is.