Deploying T-Pot on UnraidOS Using Ubuntu Server
Deploying T-Pot on Unraid Using Ubuntu Server
I wanted a way to visually look at attacks when they come in. I plan on opening the IP with tailscale with a friend to see attack scenarios
I decided to deploy T-Pot as a dedicated honeypot VM inside my Unraid server instead of installing it directly on the host. Since T-Pot modifies networking, installs multiple Docker containers, and binds many ports, isolating it inside its own virtual machine is the safest approach.
I did it this way because my Unraid Server run 24/7. I didn’t want to run a VM on my personal PC and have to have it running all the time.
This post walks through the full process, including the silly mistakes I made along the way and how I fixed them.
Enabling VMs in Unraid
First, I enabled virtualization in Unraid.
Navigate to:
Settings → VM Manager
Make sure:
- Enable VMs: Yes
- Disable Autostart/Start option for VMs: No
I initially had the “Disable Autostart/Start option” set to Yes, which caused this error:
1
2
Failed to start QEMU binary for probing:
Start/autostart is disabled in VM settings.
Unraid was blocking VM startup entirely. Once I switched that setting to No, VM creation worked properly.
Downloading Ubuntu Server
T-Pot requires a minimal Linux install with no graphical environment.
I downloaded:
Ubuntu 24.04 LTS (Server)
Not Desktop. Not short-term release.
I placed the ISO inside my Unraid ISO share:
1
/mnt/user/isos/
This allows the VM manager to access it when configuring the virtual machine.
Creating the Ubuntu Server VM
Under:
VMs > Add VM > Ubuntu
I configured:
Machine: i440fx-7.0
BIOS: OVMF
Primary vDisk Bus: SATA
Disk size: 128GB
RAM: 4GB
vCPUs: 2
Network: br0
Mistake #1: Disk Not Detected
Initially, Ubuntu reported:
1
Block probing did not discover any disks.
This was caused by using a different disk bus configuration. Switching the Primary vDisk Bus to SATA resolved the issue and allowed the installer to detect the virtual disk.
Installing Ubuntu Server
During installation:
Selected Ubuntu Server (minimized)
Left third-party drivers unchecked
Used entire disk
Allowed automatic partitioning (LVM enabled by default)
When prompted for additional software (“Featured Server Snaps”), I selected nothing.
After installation completed, Ubuntu displayed:
1
Please remove the installation medium, then press ENTER.
Mistake #2: Forgetting to Remove the ISO
The installer failed to unmount the CD-ROM:
1
Failed unmounting cdrom.mount - /cdrom
This happens because the ISO is still attached to the VM.
Fix:
Stop the VM
Edit the VM
Change OS Install ISO to None
Start the VM again
After removing the ISO, the system booted correctly into the installed Ubuntu Server instance.
Updating the System
Once logged in:
1
2
3
sudo apt update
sudo apt upgrade -y
sudo apt autoremove -y
This ensures the server is fully patched before deploying T-Pot.
Installing T-Pot
After updating the system, I cloned the T-Pot repository and began installation:
1
2
3
git clone https://github.com/telekom-security/tpotce
cd tpotce
sudo ./install.sh
When the installation finishes successfully, this was displayed:
1
2
3
PLAY RECAP
127.0.0.1 : ok=42 changed=24 unreachable=0 failed=0 skipped=1 rescued=0 ignored=1
### Playbook was successful.
This confirms:
No failures
No unreachable hosts
Services installed
Systemd service enabled
Automatic reboot scheduled
Choosing the T-Pot Installation Type
After installation completes, I was prompted to choose the T-Pot type:
1
2
3
4
5
6
(H)ive
(S)ensor
(L)LM
(M)ini
(M)obile
(T)arpit
I wanted a full homelab deployment with dashboards, logging, and visualization tools, so I choose:
1
h
Hive installs:
Elasticsearch
Kibana
Full Web UI
Complete honeypot stack
Centralized logging
This was the recommended option for a standalone lab environment.
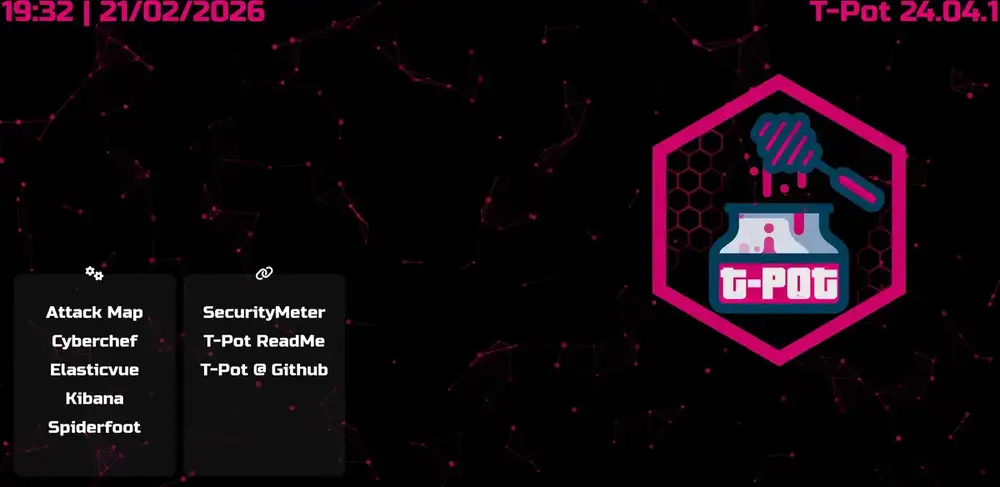
How to Access Web GUI
After selecting Hive, the installer will:
Pull containers
Start services
Configure networking
Provide a login URL
You’ll access the dashboard at:
1
https://<my-server-ip>:64297
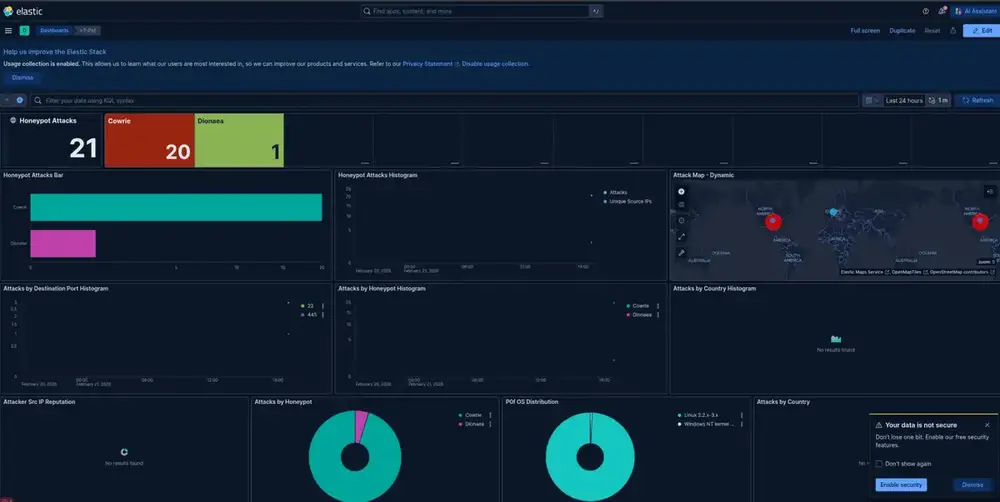
First Honeypot Activity Observed
Shortly after selecting Hive and allowing the services to start, the dashboard began showing inbound activity.
Even without exposing the VM publicly, internal network scans and SSH attempts were immediately logged.
Below is the Elastic dashboard showing live honeypot events:
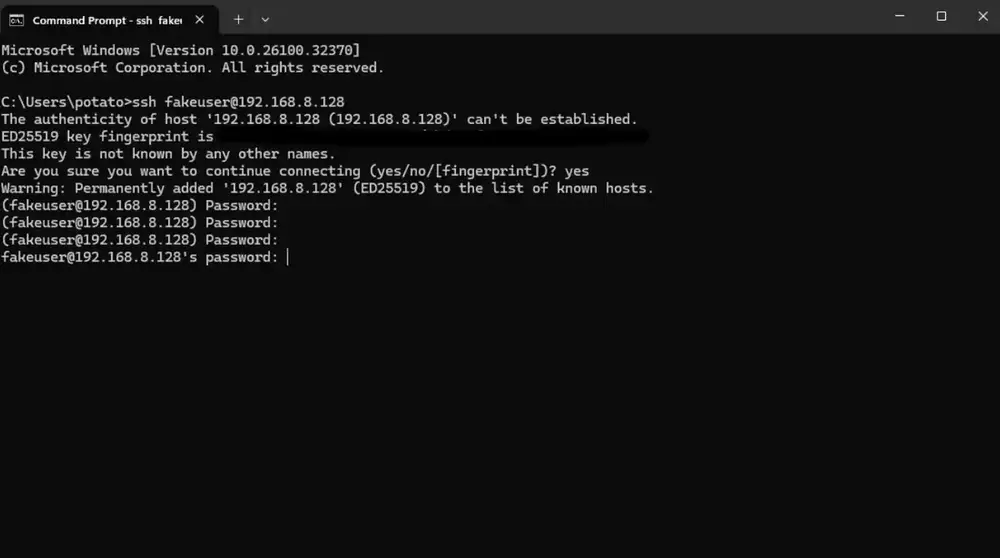
Simulating an SSH Brute Force Attempt
To confirm Cowrie was capturing authentication attempts correctly, I manually tested SSH access from another machine:
1
ssh [email protected]
After multiple failed password attempts, the activity appeared in the T-Pot dashboard and logs.
This confirms:
- Cowrie is intercepting SSH connections
- Credentials are being logged
- Events are flowing into Elasticsearch
- The honeypot stack is functioning correctly
Why Use a Dedicated VM?
Running T-Pot inside its own VM provides:
Isolation from the Unraid host
Separation from other lab systems
Controlled exposure to external networks
Easier rollback via VM snapshots
Able to run 24/7 without affecting my personal PC
Given how aggressively honeypots get scanned once exposed, isolation is critical.
Lessons Learned & Takeaways
Honestly I did not expect Unraid to complain that much for building a VM. That “Disable Autostart/Start option” really through me through a loop which kept blocking my VM and wasted time thinking it was my Ubuntu image. But it wasn’t, just Unraid protecting me from myself ha.
The disk bus also got me good. When Ubuntu first said it could not detect the disk I thought something was corrupted. Switching to SATA fixed the issue immediately! Using the wrong config will give errors so you have to make sure you are selecting the correct options.
Then I forgot about having to remove the ISO after the Ubuntu install, one of those basic work flows that shouldn’t be forgotten.
The biggest takeaway was learning that isolation is everything. T-Pot binded a lot of ports and runs full stack services. I’m super glad I decided not to install it on my Unraid host but instead instad of a VM. This allowed me to have more control, roll back options, and a peace of mind!
I did not expect to see any attacks as I did not expose it publicly. That was really wild to see.
Overall, this was one of those builds that I didn’t follow a full tutorial for. I followed documnentation. I actually understood what was happening under the hood.
Current Status
Ubuntu Server 24.04 LTS installed
System fully updated
T-Pot successfully installed
Hive deployment selected
VM isolated from other lab services
Next step will be configuring network exposure with tailscale and letting a friend attack the VM. While I will be monitoring inbound traffic.
If it’s not broken, fix it til it is.